Stable Diffusion’s latest models are very good at generating hyper-realistic images, but they can struggle with accurately generating human faces. We can experiment with prompts, but to get seamless, photorealistic results for faces, we may need to try new methodologies and models.
In this post, we will explore various techniques and models for generating highly realistic human faces with Stable Diffusion. Specifically, we will learn how to:
- Generate realistic images using WebUI and advanced settings.
- Use Stable Diffusion XL for photorealistic results.
- Download and use a fine-tuned model trained on high quality images.
Let’s get started.
Generate Realistic Faces in Stable Diffusion
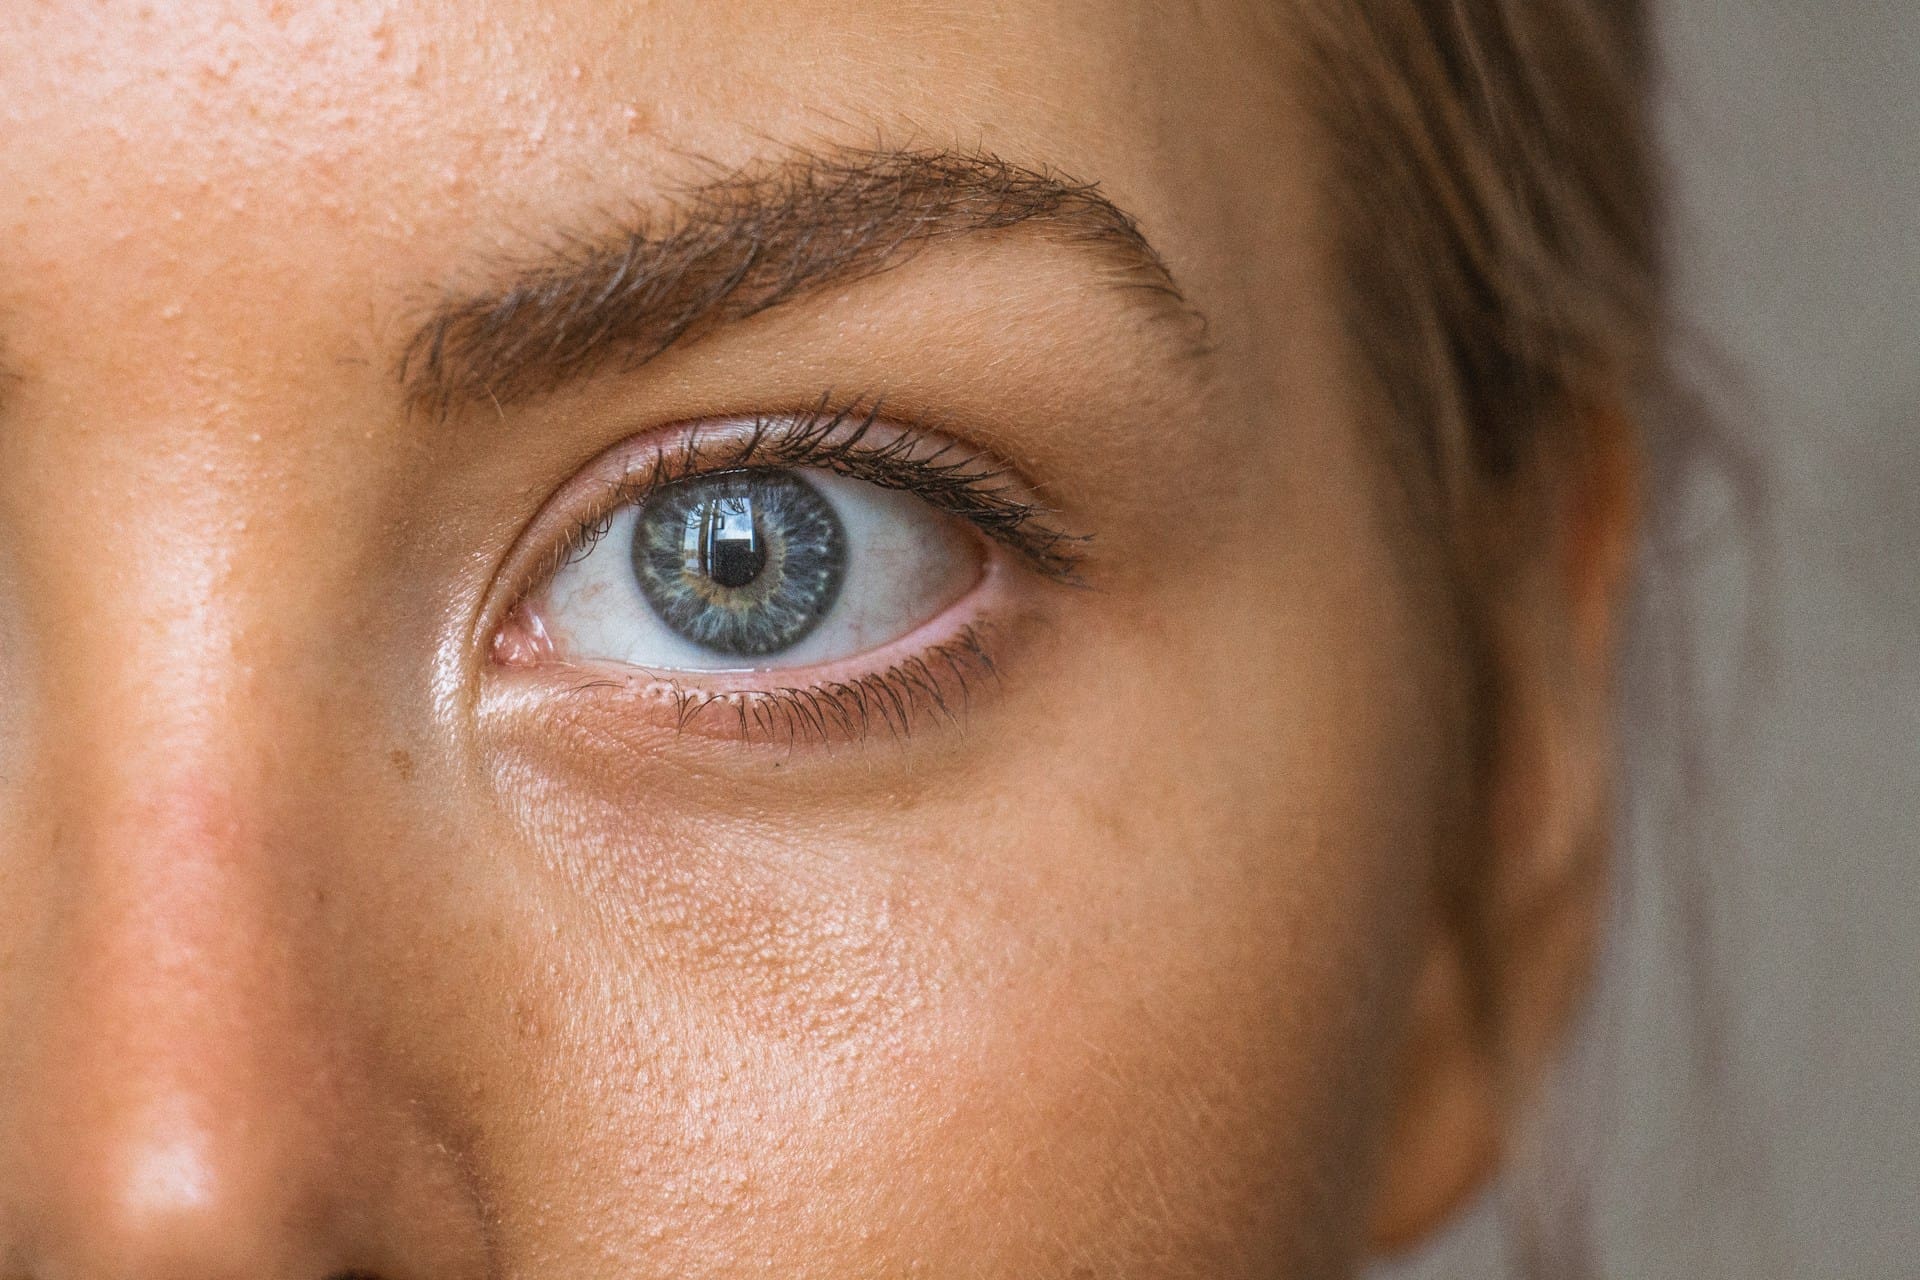
Photo by Amanda Dalbjörn. Some rights reserved.
Overview
This post is in three parts; they are:
- Creating a Portrait Using Web UI
- Creating a Portrait with Stable Diffusion XL
- Using CivitAI Models Checkpoint
Creating a Portrait Using Web UI
Let’s start with simple prompt engineering on Stable Diffusion 1.5 using Stable Diffusion WebUI locally. You need to work on positive prompt, negative prompt, and advanced settings to get improved results. For example,
- Positive prompt: “photo of young woman, highlight hair, sitting outside restaurant, wearing dress, rim lighting, studio lighting, looking at the camera, up close, perfect eyes”
- Negative prompt: “disfigured, ugly, bad, immature, cartoon, anime, 3d, painting, b&w, double images”
- Sampler: DPM++ 2M Karras
- Steps: 30
- CFG scale: 7
- Size: 912×512 (wide)
When creating a negative prompt, you need to focus on describing a “disfigured face” and seeing “double images”. This is especially important in Stable Diffusion 1.5 models. You can include additional keywords if you notice a recurring pattern, such as misaligned eyes. In order to address this issue, you can add “perfect eyes” to your positive prompt and “disfigured eyes” to your negative prompt.
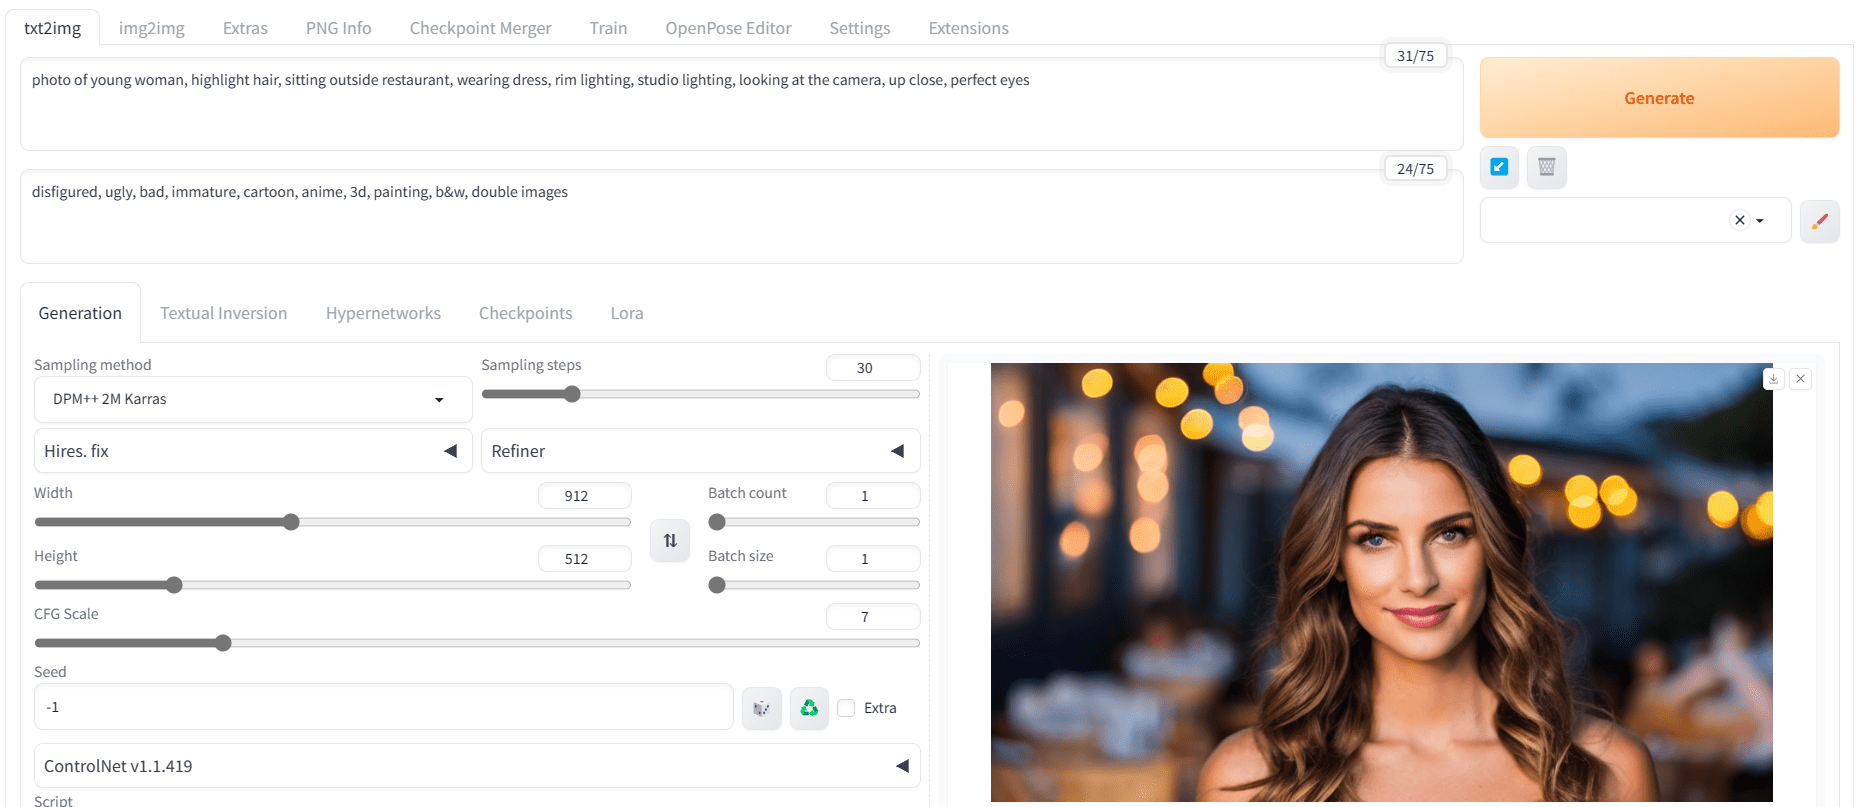
A portrait created using Stable Diffusion 1.5 model
As we can see, we got very good results on the first try. If you got a distorted or double image, try generating the image again. This model is not perfect and may occasionally generate incorrect images. So if that happens, simply generate a new image. You may also try to adjust the parameters such as sampling method, steps, and random seed. As a final resort, changing the model checkpoint also helps.
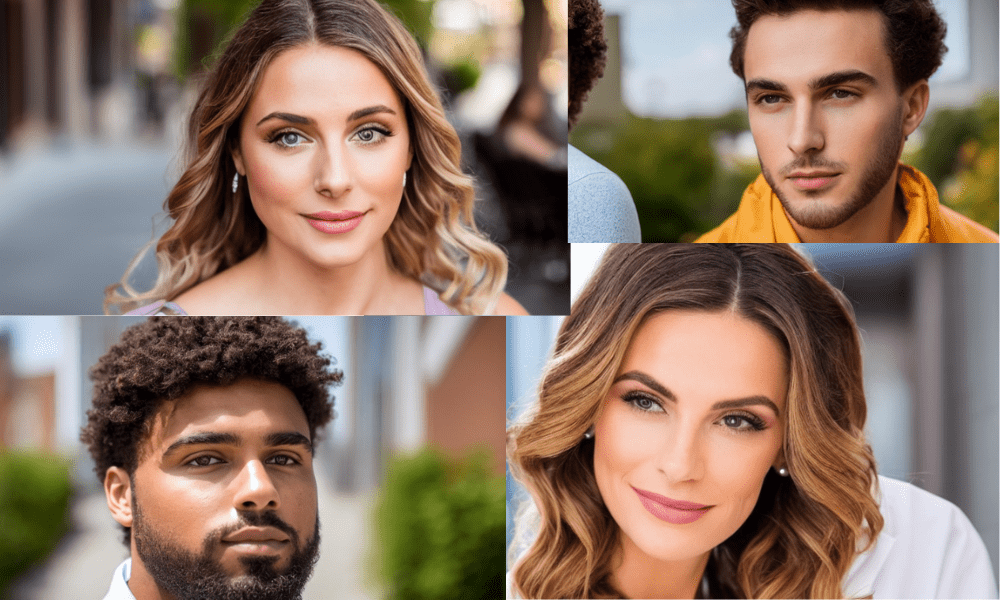
Different portraits generated by adjusting the input to Stable Diffusion
After modifying various keywords to produce diverse variations of realistic images, we achieved satisfactory outcomes even with the base model.
Creating a Portrait with Stable Diffusion XL
The most common Stable Diffusion model is version 1.5, released in October 2022. Then there is version 2.0, which is a similar architecture but retrained from scratch, released in November of the same year. Stable Diffusion XL (SDXL), that released in July 2023, is a different architecture and much bigger. All three versions have different heritages and behave differently to your prompt. It is generally believed that SDXL produce better pictures.
Let’s use the latest model Stable Diffusion XL (SDXL) to get even better image generation results. This can be as simple as downloading the model checkpoint file and save it to your stable-diffusion-webui/models/Stable-diffusion folder of your Web UI, restart the Web UI, and repeat the steps in the previous section. Running the full model locally can require a significant amount of GPU memory. If you cannot meet its technical requirement, a good option is to use the free online demos available on Hugging Face Spaces.
You can access these applications by visiting https://hf.co/spaces and searching for “SDXL”.
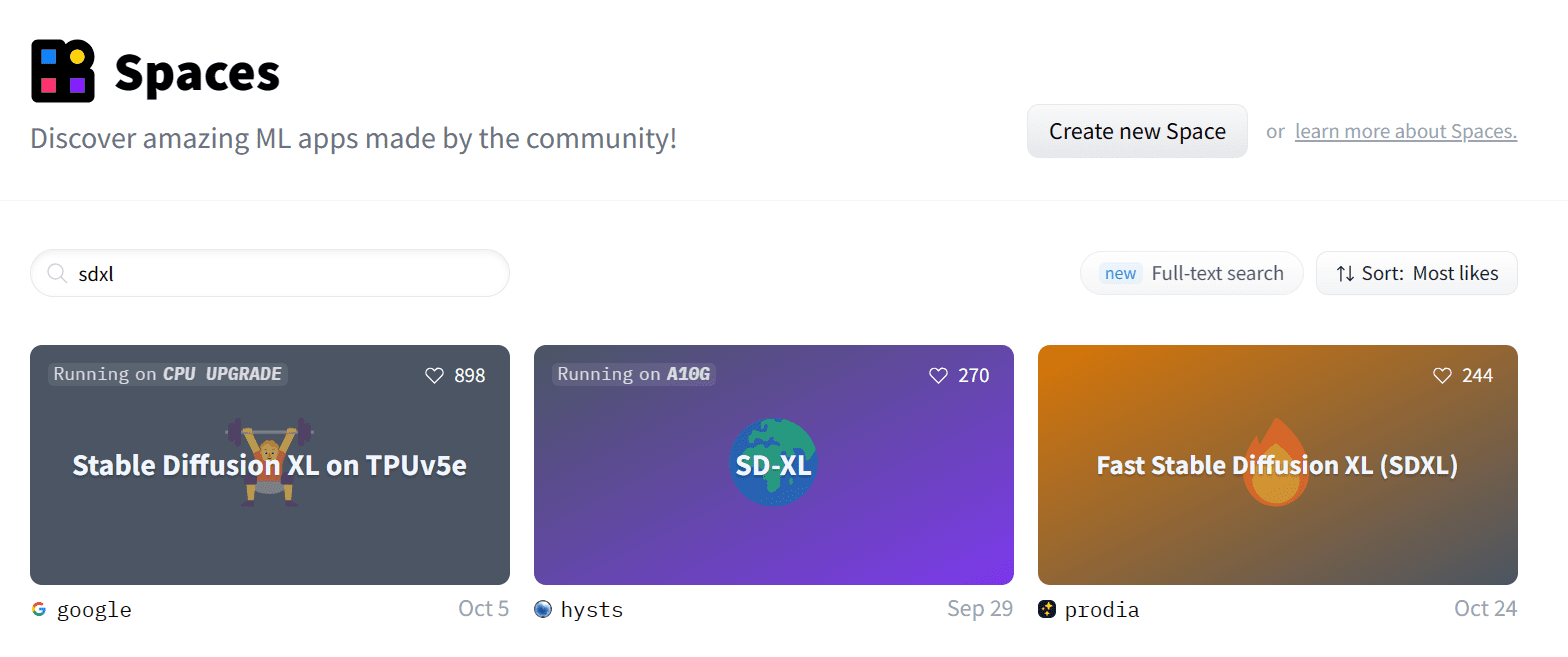
Searching “SDXL” on Hugging Face space
Stable Diffusion XL by Google
We will first try the fastest demo running on TPU version 5e to obtain our results, located at:
To ensure that our images are generated accurately, it is important to set up the negative prompt and image style to “Photographic” by going to the Advanced settings.
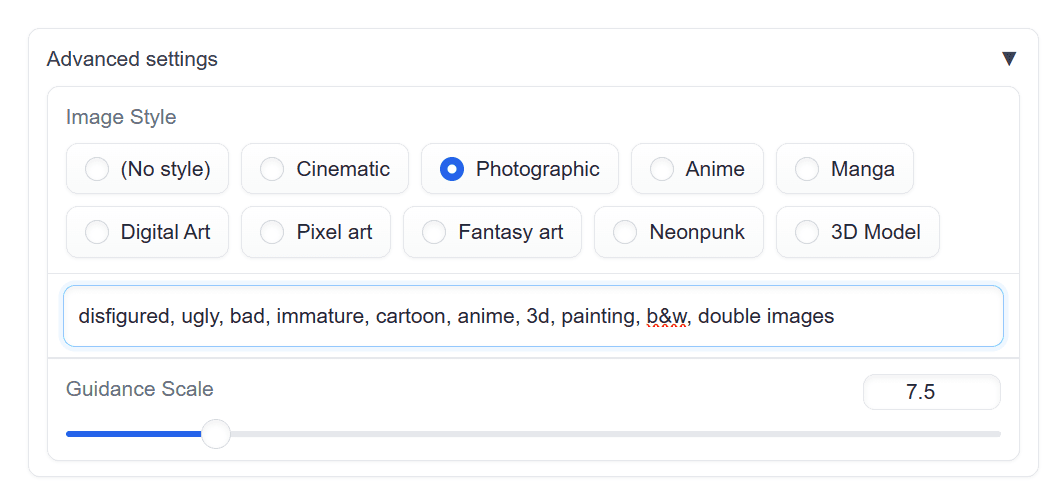
Setting “Photographic” in Advanced settings to fix the style of generated image
We will use the same prompt to generate a realistic image of the young girl sitting outside the restaurant:
photo of young woman, highlight hair, sitting outside restaurant, wearing dress, rim lighting, studio lighting, looking at the camera, up close, perfect eyes
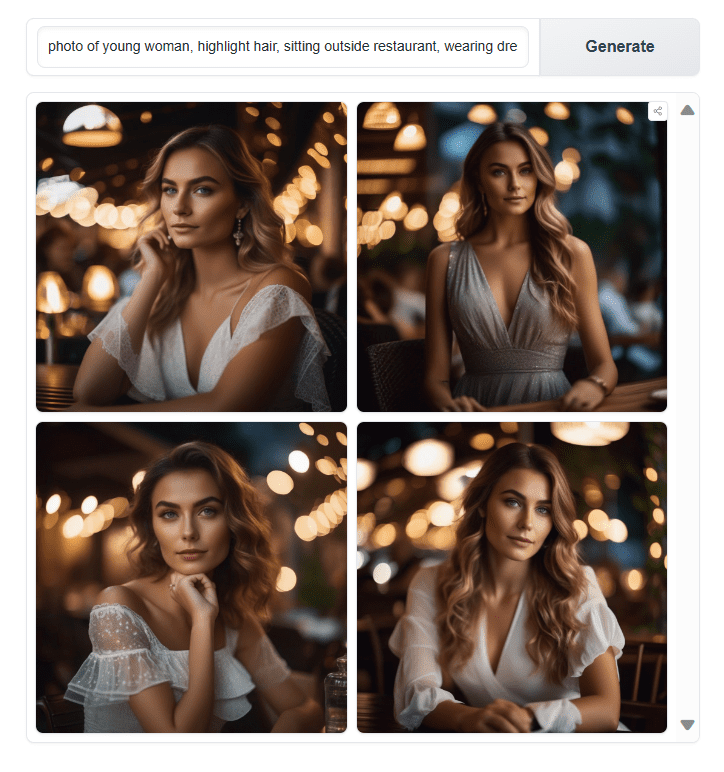
Generating pictures with SDXL
The results are impressive. The rendering of the eyes, nose, lips, shadows, and colors looks very realistic. By comparing the generated result here against the previous section, you can see the obvious difference between SDXL and its older version.
Fast Stable Diffusion XL by Prodia
There are more than one SDXL in Hugging Face Space. If you are used to the Stable Diffusion WebUI user interface then “Fast Stable Diffusion XL” Space is for you:
We will write the same positive and negative prompts to generate the results.
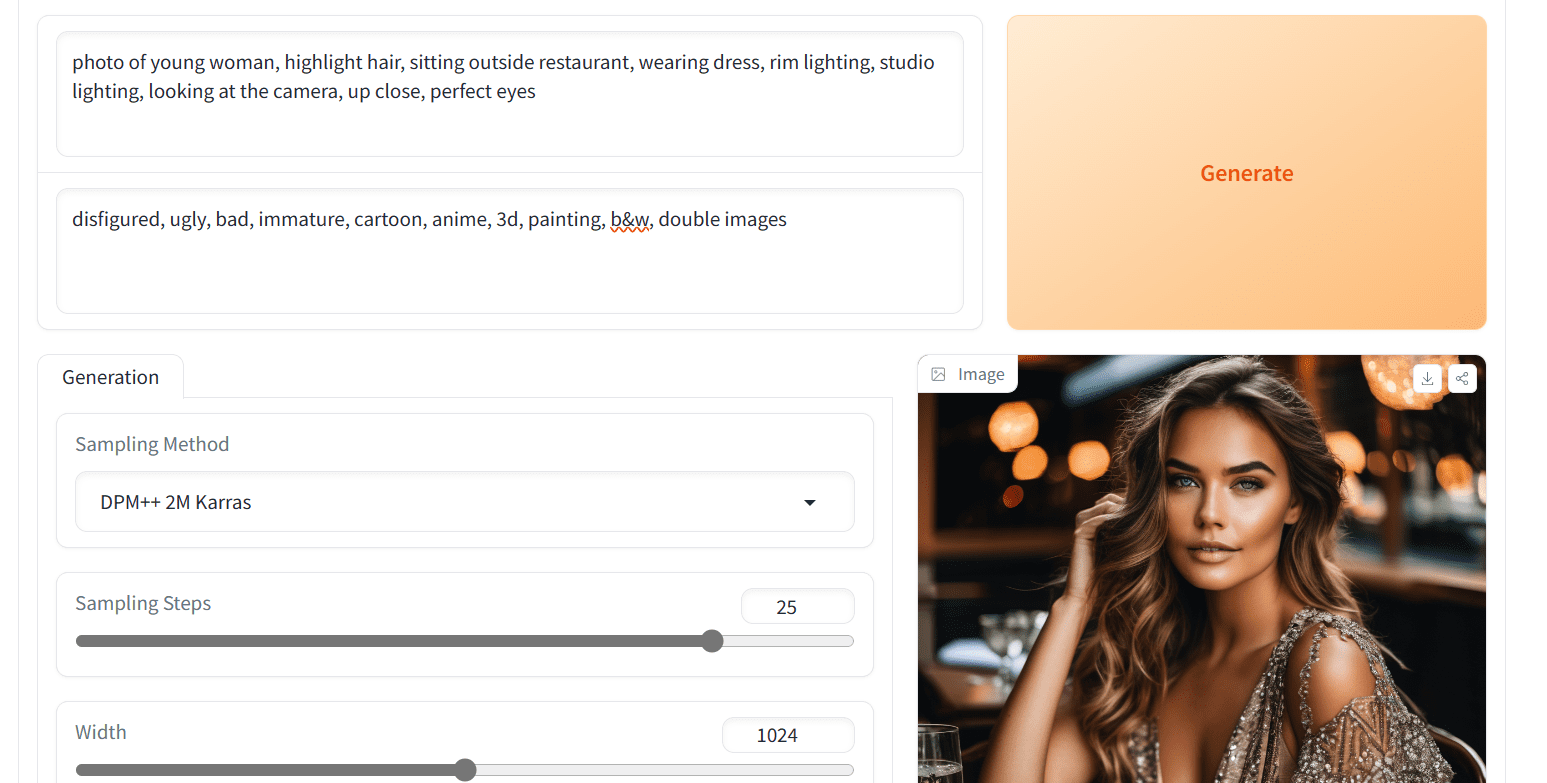
Fast Stable Diffusion XL by Prodia on Hugging Face Space
We got even better shadows and clarity in this. Let’s try to generate more images so that we can draw conclusions about our results.
Let’s modify the prompt to generate an image of a man and a woman.
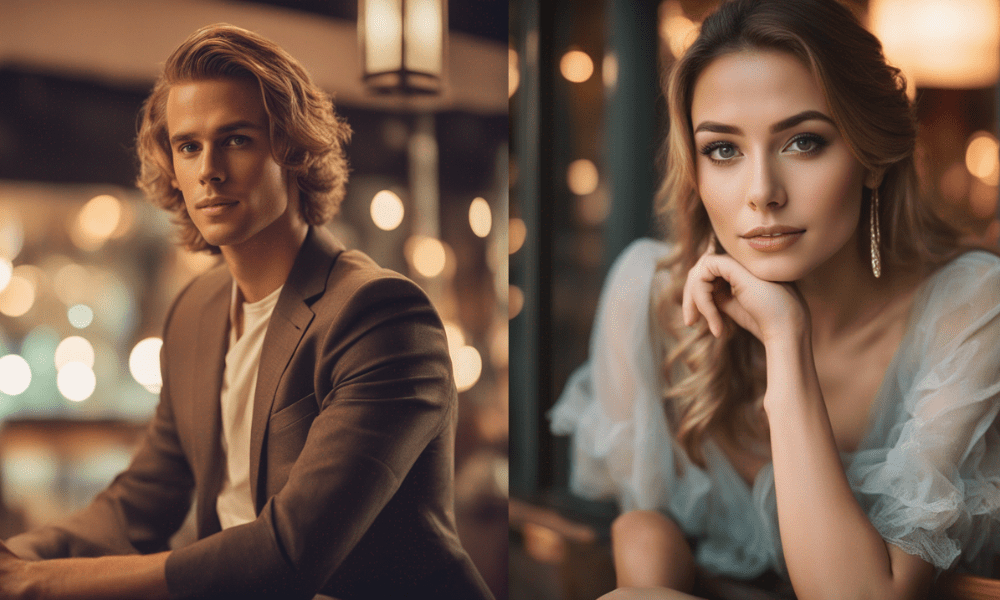
Portrait of a man and a woman generated with SDXL
The results are exceptional for generating characters of both genders and races. To test for model bias, we will generate characters of Indian descent and change the setting to a hospital, where both characters will be doctors.
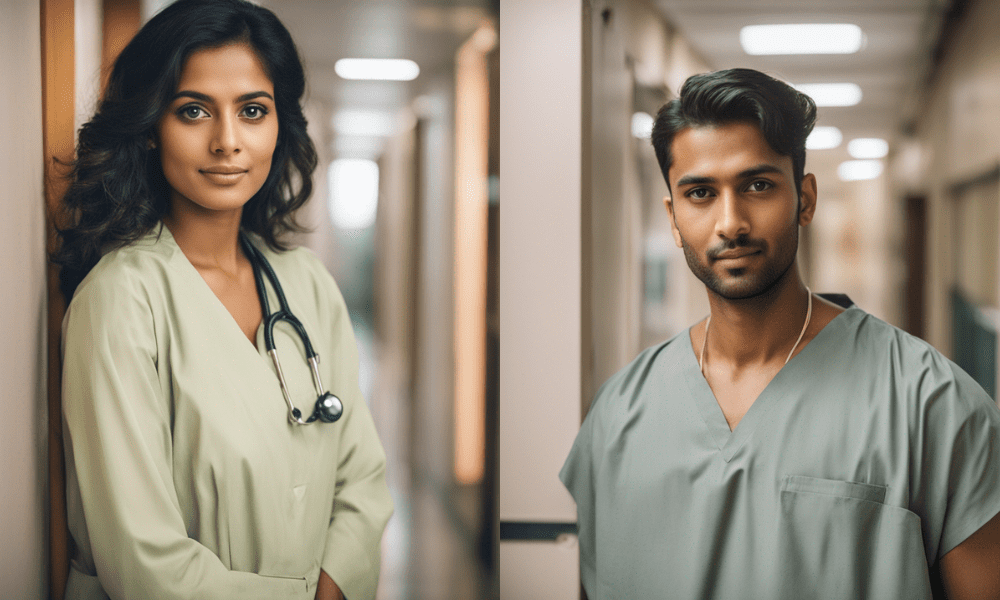
Images of a woman and a man dressed as doctors, as generated by SDXL
SDXL has generated good results, but the images appear too smooth, as if an Instagram filter was applied. Realistic images have acne, marks, roughness, and sharpness that SDXL is missing. This can be difficult to achieve in the original SDXL model but resolvable if you switch to another checkpoint.
Using CivitAI Models Checkpoint
In this section, we will step ahead and generate even more realistic faces than SDXL using CivitAI.com. It is a model hosting platform that allows users upload and download specialized versions of Stable Diffusion models. It is also a gallery for users to post their work of AI-generated pictures.
In our case, we are interested in the best photorealistic model. To download that we will search for the keyword “photorealistic”. There will be a lot. The most popular ones are probably the best. Therefore, ensure you have set the filters to get the list sorted by the most downloaded models of all time.
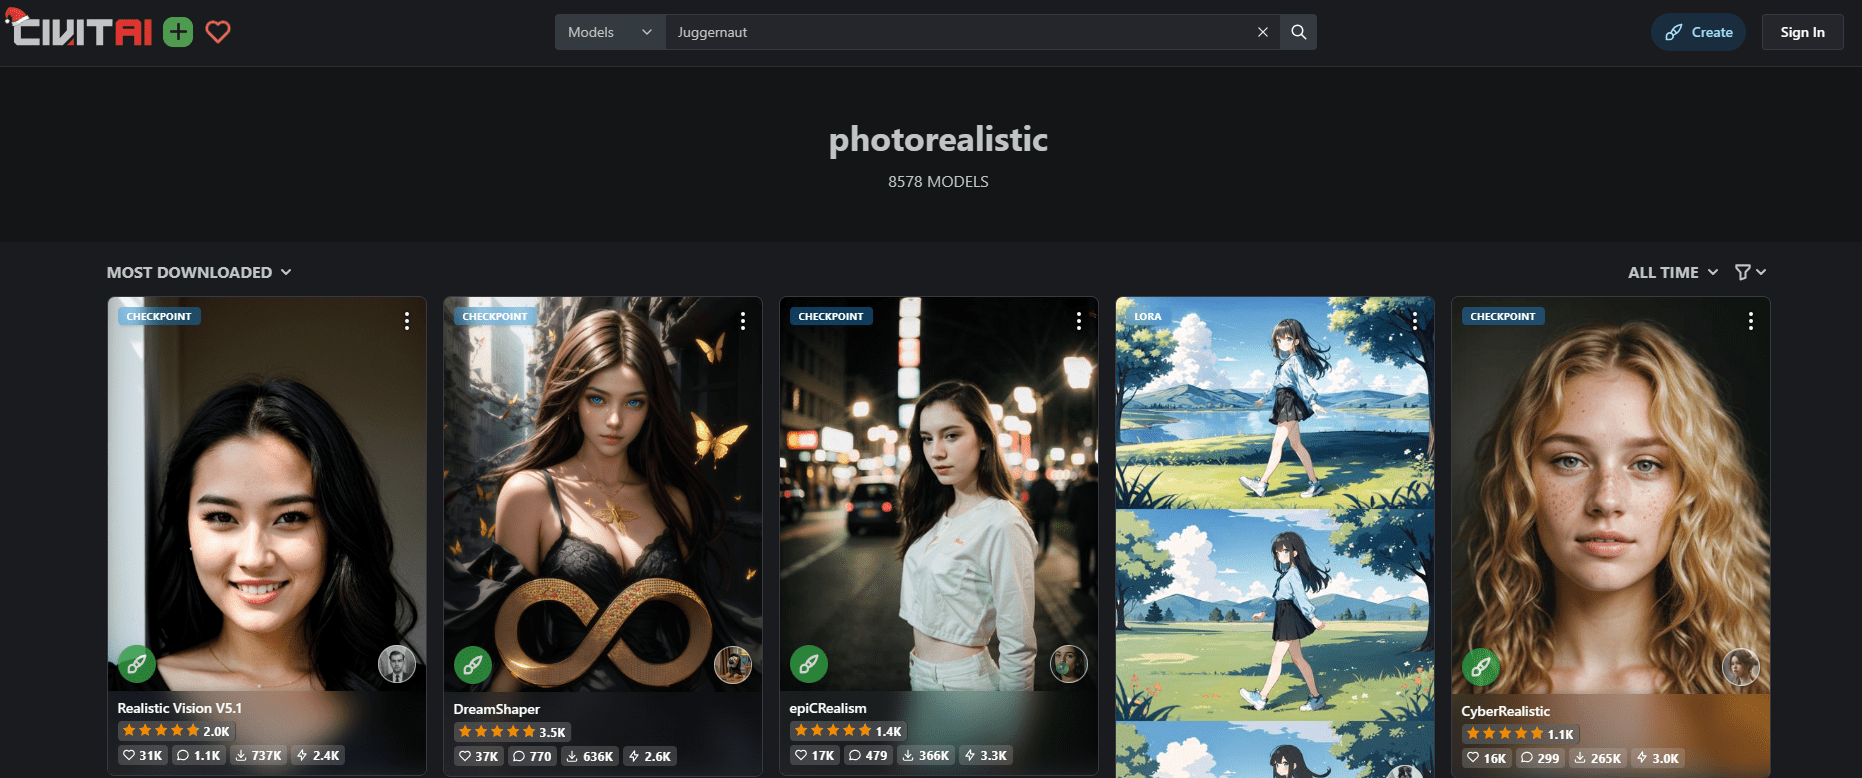
Searching for a model on CivitAI.com, setting the result to sort by “most downloaded” and “all time” would be helpful to find a quality model.
Select the most popular model and download the full version as shown (named “Realisic Vision V5.1” in this case, as depicted).

Downloading model checkpoint “Realistic Vision V5.1” (beware not the inpainting version) from Civitai.com
After that, move the downloaded model to the Stable Diffusion WebUI model directory stable-diffusion-webui/models/Stable-diffusion. To activate the model on Web UI click on the refresh button and select the newer model by clicking on the drop down panel, or simply restart the Web UI.

Selecting the model checkpoint at the top left corner of Web UI.
All the information regarding the positive prompt, negative prompt, and advanced setting is mentioned on the model page. Therefore, we will use that information and modify it to generate an image of a young woman.
- Positive prompt: “RAW photo, face portrait photo of beautiful 24 y.o woman, full lips, brown eyes, glasses, hard shadows, 8k uhd, dslr, soft lighting, high quality, film grain, Fujifilm XT3”
- Negative prompt: “deformed iris, deformed pupils, semi-realistic, cgi, 3d, render, sketch, cartoon, drawing, anime, mutated hands and fingers, deformed, distorted, disfigured, poorly drawn, bad anatomy, wrong anatomy, extra limb, missing limb, floating limbs, disconnected limbs, mutation, mutated, ugly, disgusting, amputation”
- Sampler: DPM++ SDE Karras
- Steps: 25
- CFG scale: 7
- Size: 912×512
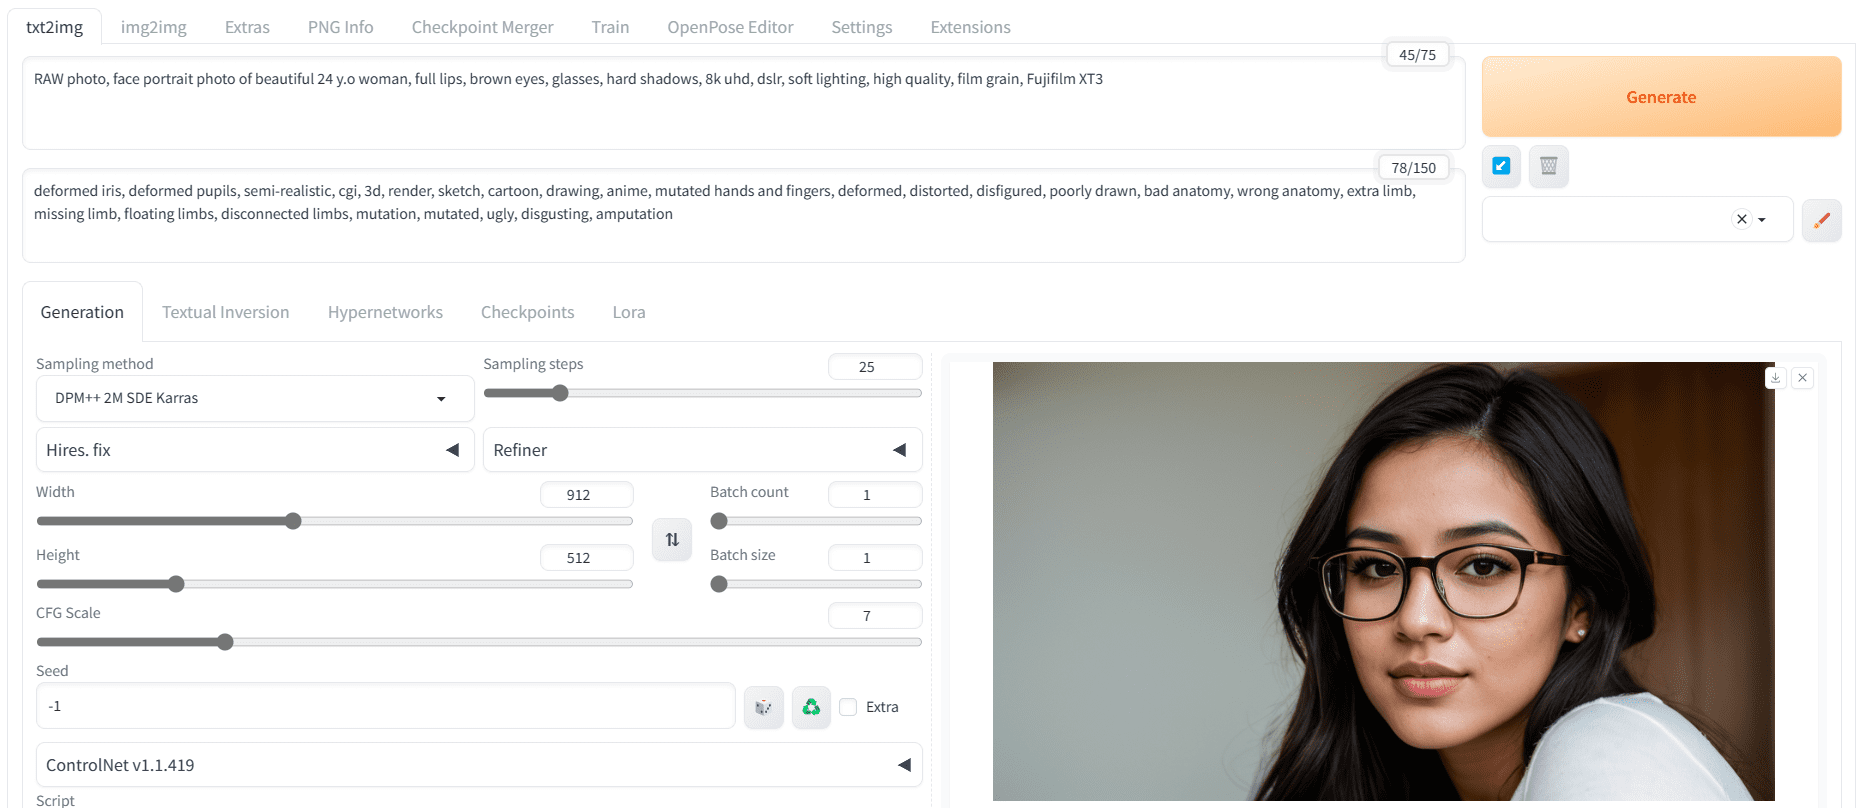
Portrait as generated using the Realisitic Vision checkpoint on Web UI
We got a sharp and accurate image of the face. Let’s experiment with different prompts to generate even more realistic faces.
We will begin with an image of a man and woman without glasses.
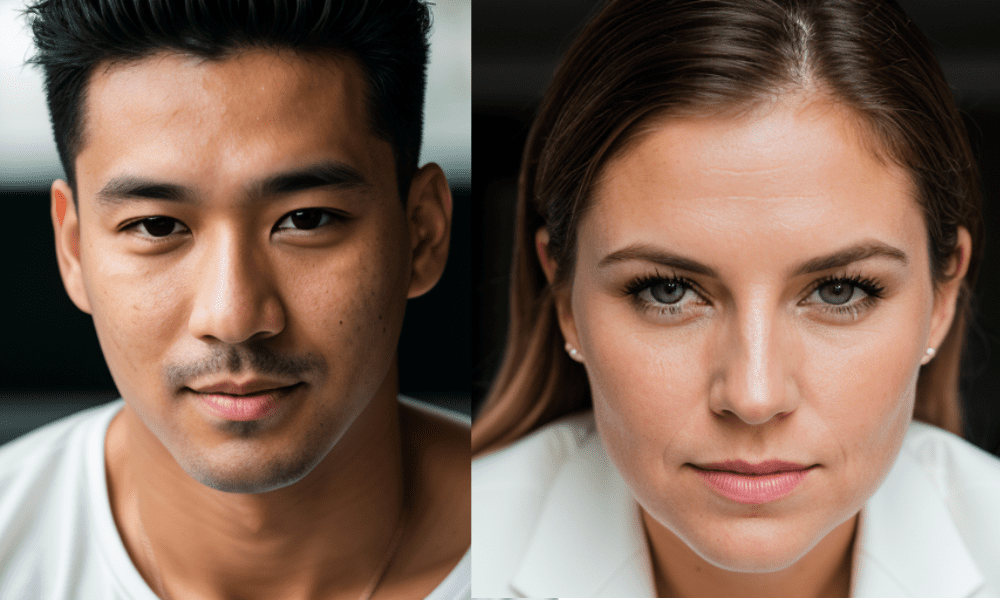
Man and woman without glasses. Images generated using the Realistic Vision model checkpoint.
Then, we will modify the prompt to generate an Indian man and woman.
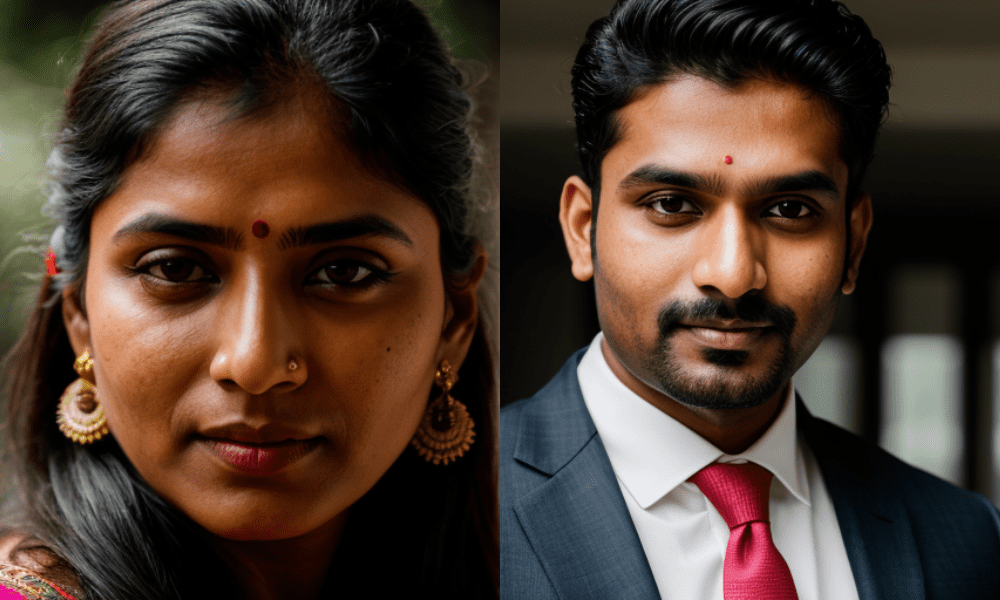
Indian man and woman. Images generated using the Realistic Vision model checkpoint.
Don’t you see the difference? We have achieved an excellent result. There is good texture on the face, natural-looking skin marks, and clarity in the details of the face.
Further Readings
You can learn more about this topic using the following resources:
Summary
In this post, we explored various methods for generating hyper-realistic and consistent faces using Stable Diffusion. We started with simple techniques and progressed to more advanced methods for producing highly realistic images. Specifically, we covered:
- How to generate realistic faces using Stable Difusion 1.5 with negative prompts and advanced settings.
- How to create lifelike photos with Stable Diffusion XL using Hugging Face Spaces’ free demos.
- Used a specialized model that was fine-tuned on high-quality images to get perfect photos with skin texture and facial clarity.
